ZAR1+ Quick3 View

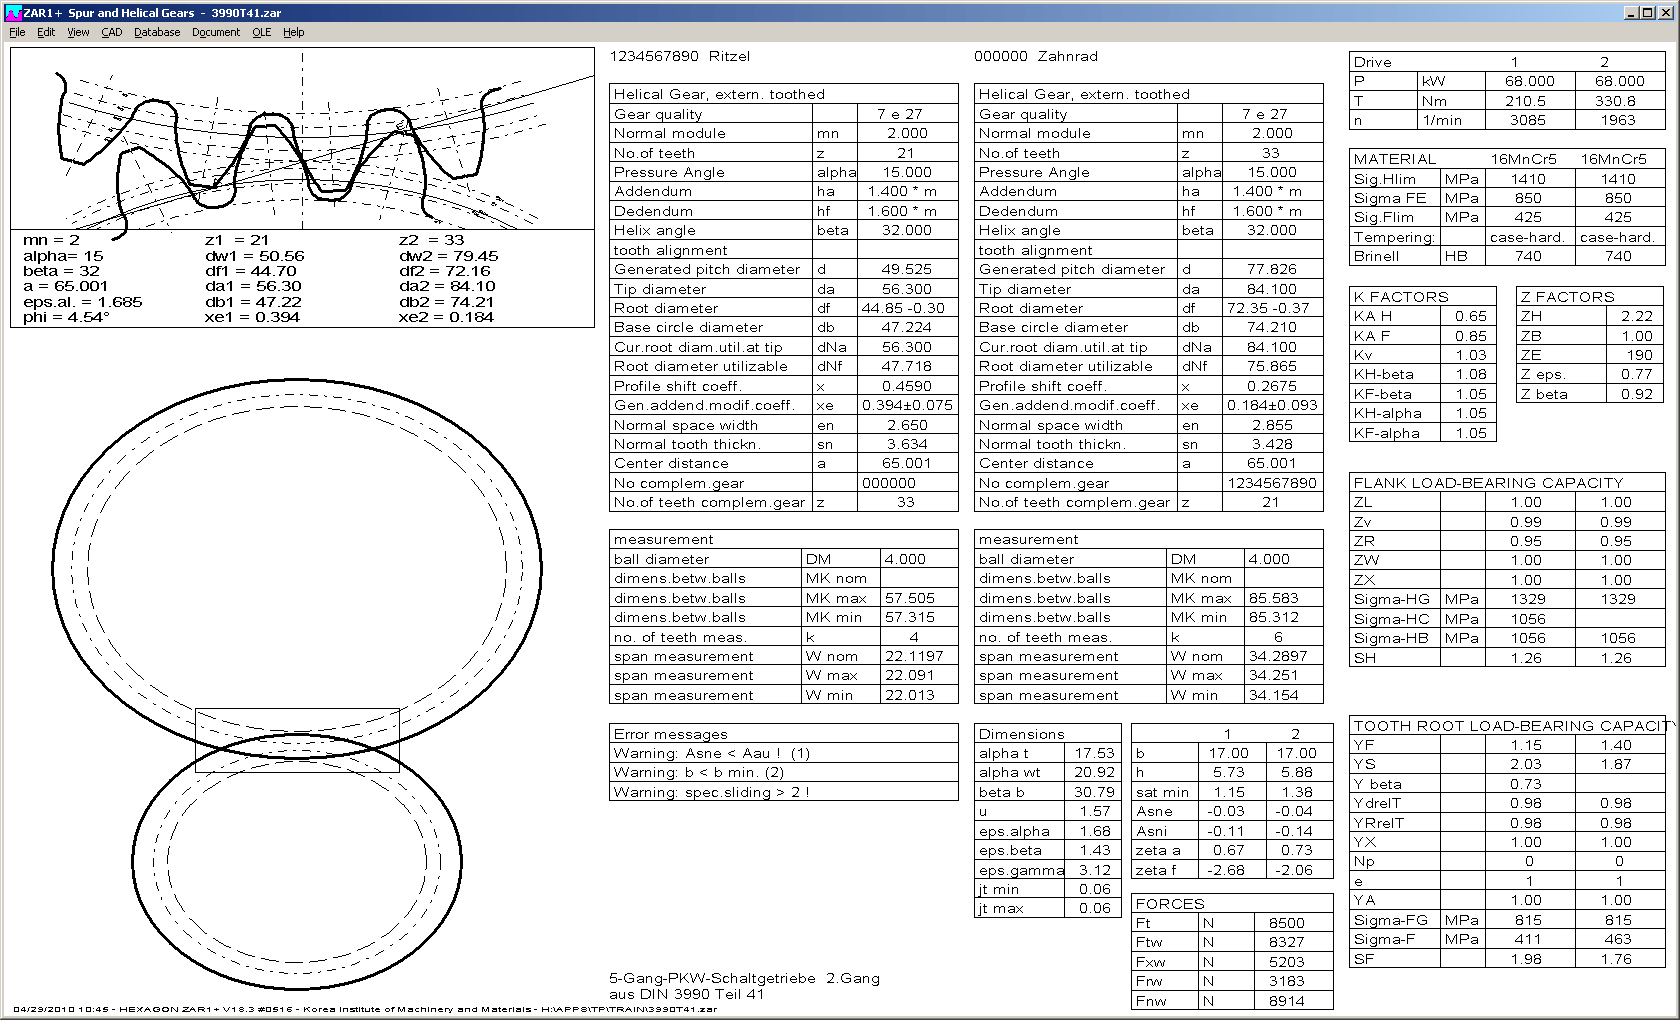
New Quick3 View in ZAR1+ shows drawing of gears and tooth contact together with tables of essential dimensions, measurement, load, material and strength data on one screen.
Quick3 View is now standard output after opening a file, result view after calculation, and result screen when comparing gear calculations at "File -> Open Table".
WL1+ DIN 471
Database required for designing a notch for a locking ring according to DIN 471 has been extended. WL1+ designs now locking ring notch for shaft diameter from 4 mm until 300 mm.
ZAR5 - Input kmn, c, da
For the case of planet gear smaller than sun gear (zP < zS), sometimes input data of addendum reduction (c, kmn, da) changed when entering the values for sun, planet and ring gear. Bug has been fixed now.
ZAR5 - Planet Gear Bearing with 2 Roller Bearings
After selection of a roller bearing from database, new version of ZAR5 asks if you want to use one or two bearings, if width of roller bearing is smaller than half width of planet gear. If you selected taper roller bearing or angular-contact ball bearing, you can decide between X and O configuration.

WL1+ View Roller Bearing
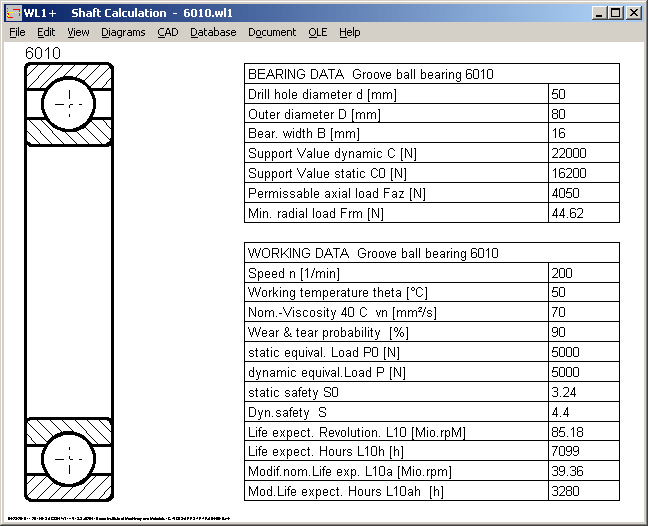
Roller bearing drawings (without shaft) and bearing data can now be displayed at "View->Roller Bearing".
FED3+ Lk alpha and Di alpha in case of load against coiling direction
If torsion springs are used in opening sense (against coiling direction), coil diameter enlarges and spring package length LK is decreased. Reduction of LK in opening sense was not considered in FED3, this has been corrected in the new version. Furthermore, the diameter calculation of mandrel and bore for spring assembly was not correct for opening sense, it seems that formulas in EN 13906 are wrong. Mandrel diameter must be smaller than minimum inner coil diameter Di (between alpha=0 and alpha=alpha2), and the bore diameter must be larger than the maximum outer coil diameter De alpha. Because coil diameter De has its maximum in unloaded condition (alpha=0), formulas in EN 13906-3 and also the formulas for mandrel DP in DIN 2194:2002 cannot be used in this case. Moreover, formulas for Dh according to 13906-3 seem to be doubtful in any case.
Diameters for mandrel and bore are now calculated in FED3+ according to following formulas (deviate from EN and DIN):
Load in coiling direction (closing sense)
Dd (mandrel) = 0.95*((Dm*n0/(n0+alpha2/360))-d)-abs(AD)
Dh (bore) =1.05*(Dm+d)+abs(AD)
DP (test mandrel)=0.95*Dm*(n0/(n0+alpha2/360))-d-abs(AD)
Load against coiling direction (opening sense)
Dd (mandrel) =0.95*(Dm-d)-abs(AD)
Dh (bore) =1.05*((Dm*n0/(n0-alpha2/360))+d)+abs(AD)
DP (test mandrel) =0.95*Dm-d-abs(AD)
(AD= tolerance D n0=number of coils (unloaded spring))
FED2+, 3+, 9: Hide Warnings
Unimportant warnings can be suppressed at "Edit->Calculation Method". Some other less important warnings will be suppressed now, if this option is set.
FED1+, 2+ 5: Factor tau/Rm

Coefficient "torsion stress tau / tensile strength Rm" is helpful for determining relaxation of spring, now displayed in relaxation diagrams and in Quick3 view.
FED1+: Hide Ln, Fn in Production Drawing
Similar than for spring loads F1 and F2, you now can also suppress usable spring length Ln und corresponding load Fn in the production drawing.
GEO4 - Sinusoidal cam
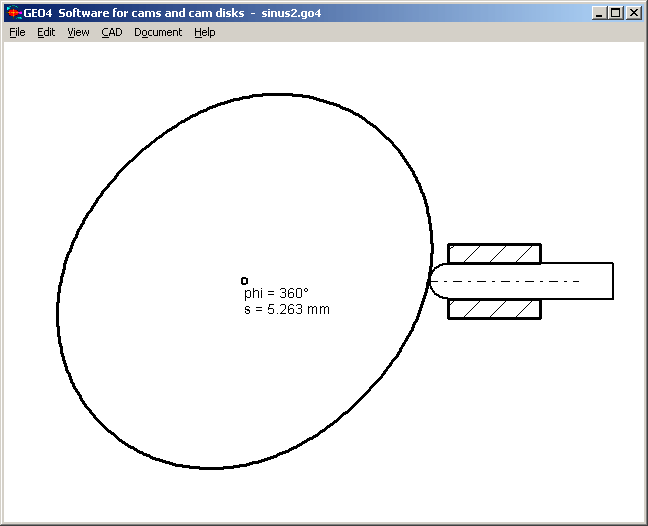
When defining a sinusoidal cam (r = r0+A*sin(phi)) for harmonic ram movement with sine curve of velocity and acceleration, you can now also define more than one sine stroke per revolution.

ZAR4 - Gear for Sinusoidal Velocity Curve
For noncircular gears with sinusoidal pitch curve, you can now also define number of sine curves per revolution. For constant speed of driving gear, driven gear oscillates sinusoidal n times per revolution.

WN2+ Modify Tooth Thickness and Tooth Gap Width
New version of WN2+ allows input of tooth thickness of external spline and tooth gap width of internal spline (buttons s1 and e2) to recalculate addendum modification coefficient and get the required backlash.

Create your own Start Screen
Default start screen in all programs is the HEXAGON logo. In newer versions (since March 2010) you can create your own start screen. That may be a company logo, instructions how to use the program, or an auxiliary image. Start screen has the same format like an auxiliary picture. Use CAD to draw your individual start screen in a frame 160 x 120 mm, then save as HPGL file with file name "start.plt".
